
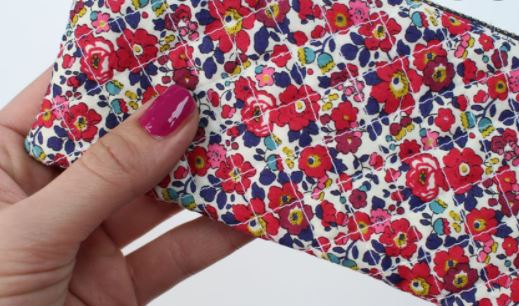
Quilting is nothing but stitching a three-layered cloth at a time. Hand quilting is the oldest or the vintage method that gives you immense pleasure and a feeling of pride. It’s a bit time-consuming, but if your budget permits, you can buy a standing hoop or a floor frame to tighten the fabric. This will enhance your control over the material, and you’ll have effortless stitching.
Making a quilt by using a standard sewing machine and some required tools is always rewarding. But on the other hand, quilting is also preferred because it gives you a chance to display your creativity. You must have observed that everyone loves quilts with attractive designs. There are numerous designs for quilt tops beginning from applique, embroidery to patchwork, or something blended. Here are some tips to follow step by step, and I assure you that you’ll improve your stitching skills by considering these tricks and techniques. You’ll be able to experiment and come up with new ideas in the field of quilting.
Contents
Set Your Machine

The stitch length setting ranges between 2.5-3.0 or 8-12 stitches for most machine quilting. This range is perfect, but for exceptional stitching where shiny or sparkle threads are used, a longer stitch length is better.
Fabric
Choosing a suitable material becomes a must for quilts. This fabric is to make a coverlet or the layer of the quilt. A layer of cotton, feather, or wool with two fabric layers is stitched together firmly in a decorative design to give your quilt an appealing look. While quilting, your machine’s walking foot needs to hold the top and the bottom layer at the same speed for smooth stitching. The foot is supposed to even feed the batting and layers of cloth through the machine. It helps make straight lines machine quilts.
Pattern/Design

Whenever you’re trying something new, it is always better to start with small things to learn the basic steps and prevent errors in the future. The same is the case with quilting; if you’re creating it for the first time, it’s good to start with a small size baby quilt.
Firstly you’ll be able to finish it fast, and secondly, and you’ll master the technique. You can pick a simple quilt pattern such as patchwork of squares, triangles, motifs, etc. By following a few tutorials, you’ll be able to design quilts with a simple combination of half-square triangles and log cabin blocks, etc.
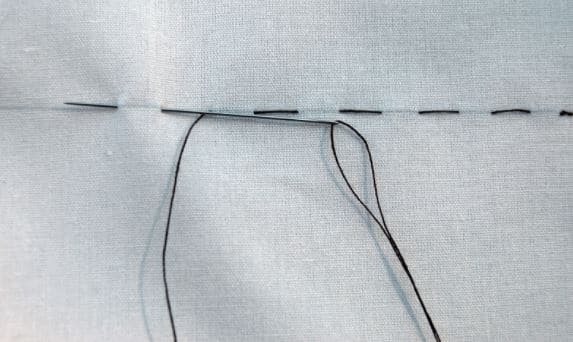
Learn To Switch Seam Ends

For beginners or new quilters, learning to sew ¼ inch seam allowances is hard. But that’s the range required for making quilts. There are some tricks to guide you to get the seams correct. It is better to carry out some tests before stitching the patches for more accuracy.
Cutting Skills

When it comes to quilting, some rotary tools provide speedy cutting and motivation. A good rotary cutter will help you cut with perfection. This cutting technique helps construct templates to mark and cut a separate piece of fabric effortlessly. Hence it helps in developing your cutting skills as a quilter.
To keep the cutting tool blades sharp, you can use a cutting mat to protect your tabletop/counter from damage caused by the cutter. Some carpets have rulers and gridlines to enhance your measurement when you are at work. These mats keep the edges safe from becoming dull/blunt and also improve their lifespan. Moreover, it controls the task of measuring and cutting while creating a quilt.
Basting
Whether it’s a hand or a machine quilt, it depends on the types of quilting you choose for your project. The quilt sandwich includes all three layers, i.e., the quality top, quilts backing, and the batting secured together through the basting process. However, basting is easy, but only if done with the right tools and positioning the quilt sandwich at the right height to avoid inconvenience. Making a quilt sandwich requires some further steps.
- Prepare and press the quilt backing.
- Then lay the fabric right side down on the surface.
- Next, secure the backing at regular intervals.
- Remove wrinkles and bumps from the surface for smooth baking.
- Remove loose and long threads by trimming the seams’ ends.
- Finally, place the marked quilt top on the right side over the batting.
Binding
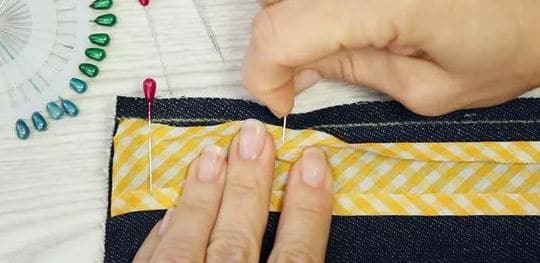
The last step of the quilting procedure includes binding the corners/sides of the quilt nicely. There are many methods of binding, but every quilter has a favorite. The double fold binding method is preferred. After quitting, if you notice some seams open, it is good to press the seams and stitch them tightly. Turn the corners with machine binding if you don’t prefer a hand stitch. To make your quilt look more funky and stylish, add your name, date, or a quotation; add a frame to highlight your quilt with contrast color. It is also good to put a label for remembrance if you want to gift it to someone.
Extra Tips And Ideas
- Get acquainted with the characteristics of the fabric you are going to use. It is essential to learn how to take care of your quilting fabric and what guidelines to follow with patch cutting. There is no need to buy costly material. Look for the quilt shop where you can find a fat quarter left from the whole rails of fabric. Generally, the quilting material’s width ranges from 44’’/110 cm so that you can mark around 55 cms x 55 cm for an ideal patchwork design.
- Learn the technique of cutting fabric pieces quickly. You can stitch big chunks of fabric and then cut them into sections to use them as pre-sewn parts. Notice how nicely you come up with a straightforward process of piecing.
- Mistakes and the learning process go hand in hand, and we all tend to make them, especially when using fabric. You need to have good knowledge of colors. During the quilting process, pick the shades in contrast to each other for a perfect finish. These elements count a lot and can be for promoting your sewing skills for the next project.
- It is good to try mitered binding when it comes to the edges of a quilt. This method has gained a lot of reputation despite being difficult. This technique is an important step that many overlook. So quilters find it difficult with a wider or narrow binding. Hence, applying mitered binding instructions can make your quilting a good experience. Make sure to try this technique when you are stitching a quilt.
- For enjoying your quilt, you can hang it on the walls with the help of sleeves. This will enhance your interior decor, and you will get a chance to exhibit your talent in front of your visitors. You can experiment with different techniques like patchwork embroidery, straight-line quilting, free motion, and many more.
Conclusion
Doing something creative for the first time is always overwhelming. And if you are into stitching, then various questions keep you wondering. Start with a simple project. Creating a quilt is simple. If you follow the steps above, you’ll be able to finish your task in a week.
Ensure that you incorporate all the techniques and steps so that your project becomes a memorable experience. Always start with baby quilts and then slowly proceed to larger ones. Choose the best fabric and the tools to help you stitch better.
Pick an easy pattern, cut the pieces accurately, sew them either by hand or a machine, baste the quilt sandwich using a temporary spray to hold the fabric layer together, and then start stitching. By the end of the day, and you’ll master the art and make fabulous quilts and start quilting to the next level.