
Be it any occasion or season; we feel the need to decorate our houses to bring in cheerful and happy vibes. Every house decoration starts with the front door, and wreaths are considered traditional ornaments used to decorate the doors for many holidays like Christmas and Halloween. If you like placing a seasonal wreath on your front door, then these fun wreath ideas will be your ticket. These wreaths are perfect crafts that can be easily used at any time of the year. These gorgeous and easy handmade wreaths will make your front door look highly impressive and creative. The fun fact about these DIY wreath ideas is, they are super cheap and fun to make. This article brings you a few easy and quick DIY wreath ideas.
Hello Spring Wreath

Here is what you’ll need to create this DIY Spring Wreath
- Foam Wreath Form
- ½ Yard of Fabric
- Floral Pins
- Two Floral Sprigs
- Two Bunches of Tulips
- Scissors
- Cutting Mat
- Wide Grosgrain Ribbon
- Chipboard Hello
- Yellow Paint & Brush
- Hot Glue
Directions
- Start by painting your “hello” clipboard in any color you want, as it can dry while you assemble the rest of the wreath.
- Cut your fabric by using mat and cutter into 3″ wide strips to wrap it around the wreath form.
- Starting on the backside of your foam, secure the fabric strip in place with a floral pin, and begin wrapping the fabric around the foam. Keep wrapping the material until the entire wreath form is covered.
- After covering your foam, add on some flowers and filler sprigs to it. Place the sprigs criss-cross and secure them with floral pins. And add some tulips in a scattered fashion and secure them.
- Take your beautiful grosgrain ribbon and wrap it around the center of your wreath to hide all your floral pins and flower stems.
- Lastly, glue on your “hello” clipboard, and you’re all done!
Butterfly Wreath Covered with Moss
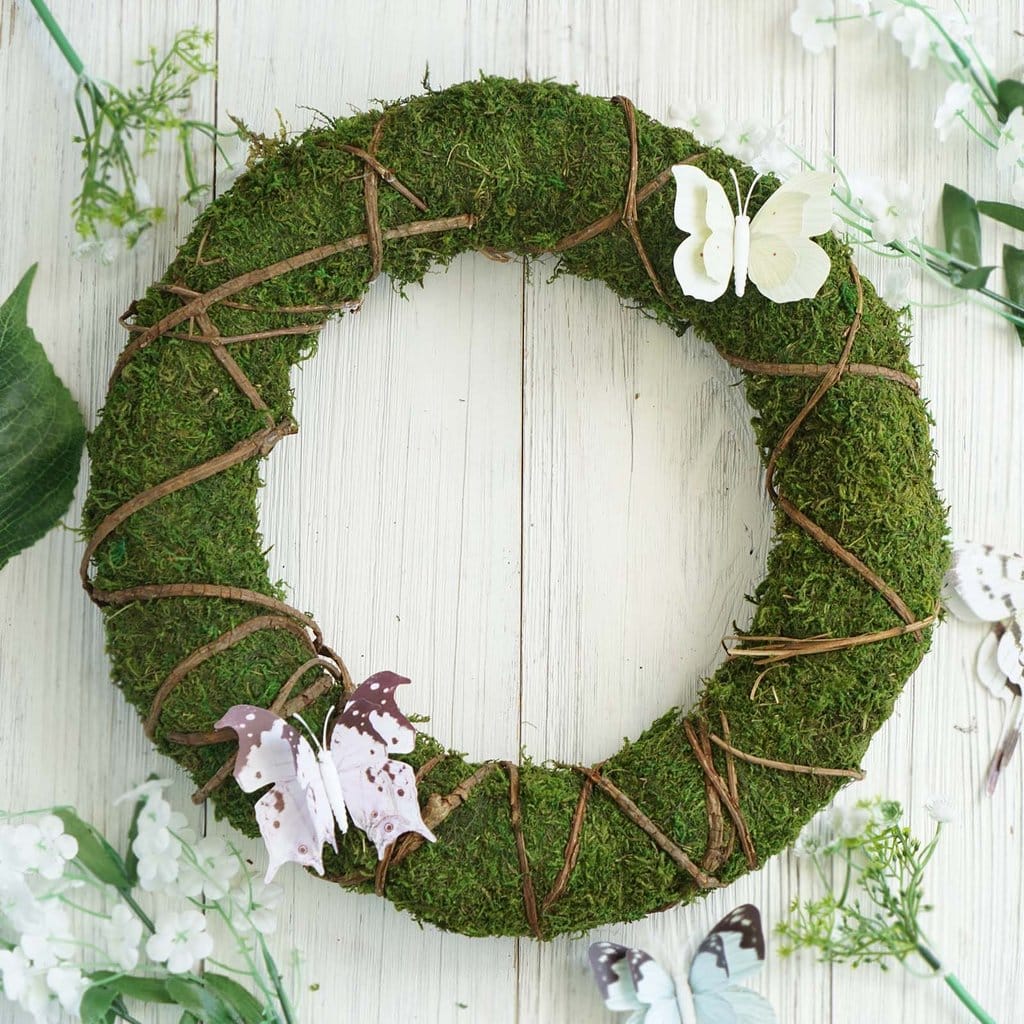
Here is what you will need to create this DIY butterfly wreath covered with moss
- A Sheet of Moss
- Foam Wreath Form
- Hot Glue
- Satin Ribbon
- Artificial Butterflies
Directions
- Cut the moss sheet into strips wide enough to cover the wreath form.
- Start covering your wreath form with these moss strips with the help of hot glue.
- If your butterflies have long writers attached, cut it to an inch and a half. Stick the butterflies on the wreath with glue, and let it dry.
- Lastly, add a beautiful satin ribbon and hang it up on your front door.
Birds Nest Spring Wreath

Here is what you’ll need to create this DIY bird nest spring wreath
- Twelve-inch Wreath Form
- Durafoam Eggs
- Blue Chevron Burlap Ribbon
- Decorative Bird Nest (small size)
- Americana Chalky Paint in Color Escape Blue
- Wired Linen Flowers (small size)
- Paint Brush Set
- Stick Pins
- Twist Tie
- Glue Gun
- Burlap Ribbon Branches
- Acrylic Paint – Milk Chocolate Brown and Spa Blue