Skip to content

DIY Candles For Beginners

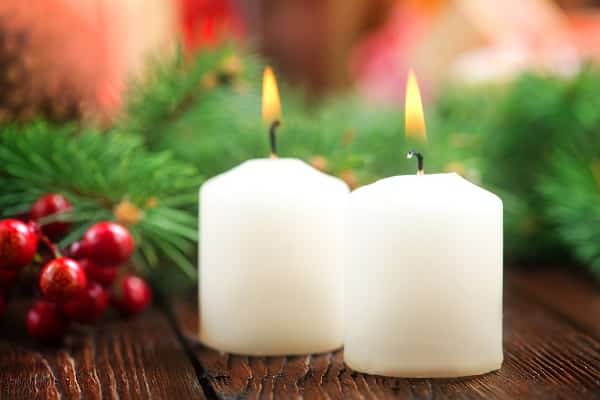
    Suppose you like home designing and also want to be economical about it. In that case, DIY projects are the best options for creating your very own, inexpensive home décor. The projects you do yourself help you pass the time and be lovely and unique. Though there are many DIY home décor project ideas out there, you would want something easy and uncomplicated. You can try out making your candles! Making DIY candles is a beginner-friendly project. Besides being simple, you can customize them as much as you want, and they turn out to be extremely beautiful. There are many reasons why making candles is a crafter’s favorite project! If you go out to buy a scented candle, you will find they are too expensive to invest in it. But making your own costs a few bucks yet function and smell just like the costly candles from big brands. Before you start working on your DIY candle, you will need to know what supplies to buy and the steps to make one.

    Supplies You Need

    You can choose to make regular, unscented candles or liven up things a little by incorporating essential oils that would make your candles scented. The things that you will need are-

    • Containers, preferably small glass jars- You can get up to a dozen of these. Glass yogurt jars work well too. These jars are available in many size options and shapes on Amazon.
    • Soy wax: It is better than natural wax, and 5 pounds of this makes at least 20 candles.
    • Good wicks: You should get pre-made wicks as they go a long way.
    • Measuring cup: You will need glass measuring cups for your project as the wax is difficult to clean off plastic.
    • Sauce Pan- It would be best if you bought a new saucepan measuring 3 quarts for making your candle. It would be better than using the one you have as it’ll be quite challenging to get the wax cleaned after your project.
    • Non-toxic crayons: A box of crayons is a great way to add color to your candle. You can customize the colors with less effort according to what you want.
    • Essential oils or Scents: If you want a DIY scented candle, you can buy essential oils like lavender or vanilla or buy a scent pack. You can easily buy scent packs online.
    • Clothespins made of wood- You need these to hold the wicks up when the wax is setting.
    • Candy thermometer: Last but not least, you would want a candy thermometer that preferably measures up to 200 degrees Celsius.

    How to make your DIY candle

    After getting all your supplies, follow the steps given below to create your DIY candles.

    Setting Up Wicks

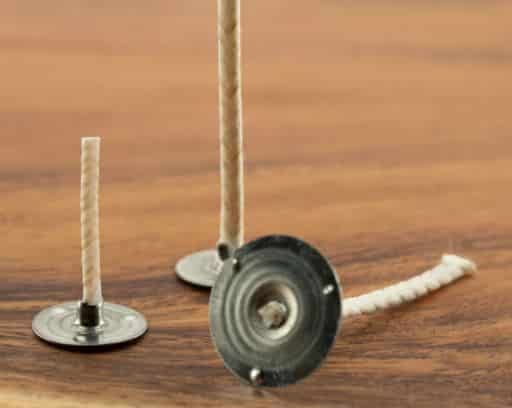
    Keep your jars prepared beforehand as you don’t want to mess about with the jars when working the wax. Position your wicks straight inside the jars and hold them up with the wooden clothespins. After this step, set the jars with the wax aside.

    Melt The Soy Wax

    Do not melt the wax directly in the pot, as this will completely ruin it and make a mess. Fill up two-thirds of the pan or pot with water. Fill a measuring cup with wax and hook its handle on the pan’s side. If the water seems like it would boil over the edge or into the wax, remove some. Measure the water temperature. When it is about 170 degrees celsius, pour in a little more wax until the measuring cup is half-filled. Stir to speed up the melting. Add some wax in the measuring cups until there is a volume of two cups of melted wax. Continue this process until the thermometer reads 170 degrees.

    Add Coloring

    Cut small bits of crayons of the colors you like and add them to the wax. Keep stirring until the crayon bits are fully melted. You should know that the color of the wax would change when the wax cools. So add more color to make it more vibrant to achieve the desired shade at the end. Don’t worry if the wax turns out a bit off-color; as with practice, you will get the hang of it.

    Add Scents

    This is an optional step depending on whether you want a regular candle or a scented one. If you are going for scented candles, you should start by adding around ten drops of essential oil, totally up to your choice, to the wax. It, too, would need some practice till you can do it right. Some scented oils are stronger in scent than others and may require different measurements than others. Remember that you should not add too much oil because it would hinder the wax’s proper setting.

    Pour The Wax

    After your concoction is done, start pouring all of it into the glass jars. If you see the wicks a bit off-center, reposition them gently.

    Wait And Finally, Clean Up

    Now, you will need to wait for about 6 hours or overnight for the wax to completely set and get hardened. After the wax is set, trim the wick to a length of about half an inch. Clean or wipe away any extra wax that could have fallen outside the jar.

    Conclusion 

    Just after the 2000s, candles just jumped from a regular and excellent item to have in your home to a status symbol in terms of home décor. This trend started after candle makers, and luxury perfumers started selling beautifully colored and scented candles. But there is a little bit of controversy regarding if these luxury candles are worth it. Because, why pay 50 bucks for a scented candle, especially when you can easily make your own? As you must have already understood from the above article, these are super easy to make and take just a few hours off your Sunday afternoon. Candles add warmth and coziness to your home, but they don’t last forever. So instead of thinking of purchasing pricey ones from luxury brands, make a DIY one in the comforts of your home!